

The first time I told my mother I wanted a cartilage piercing, she looked at me like I’d announced plans to join the circus. That was fifteen years ago, and now I have seven piercings scattered across both ears — from simple helix studs to an industrial bar that still makes my hairdresser nervous. What I’ve learned is that cartilage piercings aren’t just about rebellion or self-expression, though they can be both. They’re about understanding your ear anatomy, choosing the right jewelry, and knowing exactly what you’re signing up for.
Most people think cartilage piercings are just “ear piercings but higher up.” They’re not. The healing process is completely different, the pain levels vary wildly depending on location, and the aftercare requires more patience than most people expect. I’ve watched friends rush into getting multiple piercings at once, only to struggle with infections, bumps, and jewelry that their ears rejected entirely. The difference between a piercing that heals beautifully and one that becomes a months-long problem often comes down to preparation and realistic expectations.
Understanding Cartilage Piercing Types
Helix piercings sit along the outer rim of your ear and are the most forgiving for beginners. The cartilage here is relatively thin, which means less pain during piercing and typically faster healing. I started with a single helix stud and found the discomfort manageable — similar to a sharp pinch that fades within minutes.
Conch piercings go through the thick cartilage in your ear’s center bowl. This was my most painful piercing by far, and the healing took nearly a year. The cartilage is substantial here, which means more pressure during piercing and a longer recovery time. However, conch piercings offer the most dramatic visual impact and work beautifully with both studs and hoops.
Tragus piercings puncture the small, thick piece of cartilage in front of your ear canal. The cartilage density makes this one surprisingly painful, and sleeping can be uncomfortable for weeks. What I didn’t expect was how much the placement affects daily activities — wearing earbuds becomes impossible until it’s fully healed.
Industrial piercings connect two points of cartilage with a single long barbell. This is essentially two piercings that must heal simultaneously while connected by jewelry. Mine took 14 months to fully heal, and I had to give up sleeping on that side for most of that time. The visual payoff is striking, but it requires serious commitment.
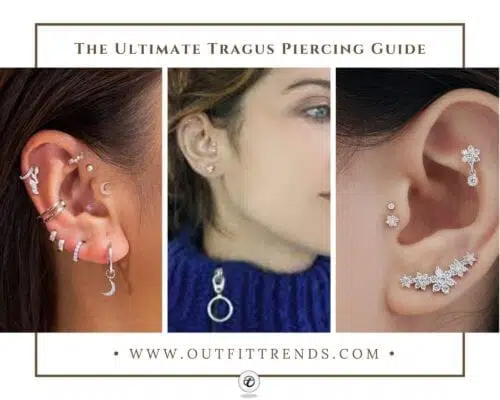
Tragus Piercing Guide – Everything You need to Know

Surface Piercings – Everything You need to Know About It
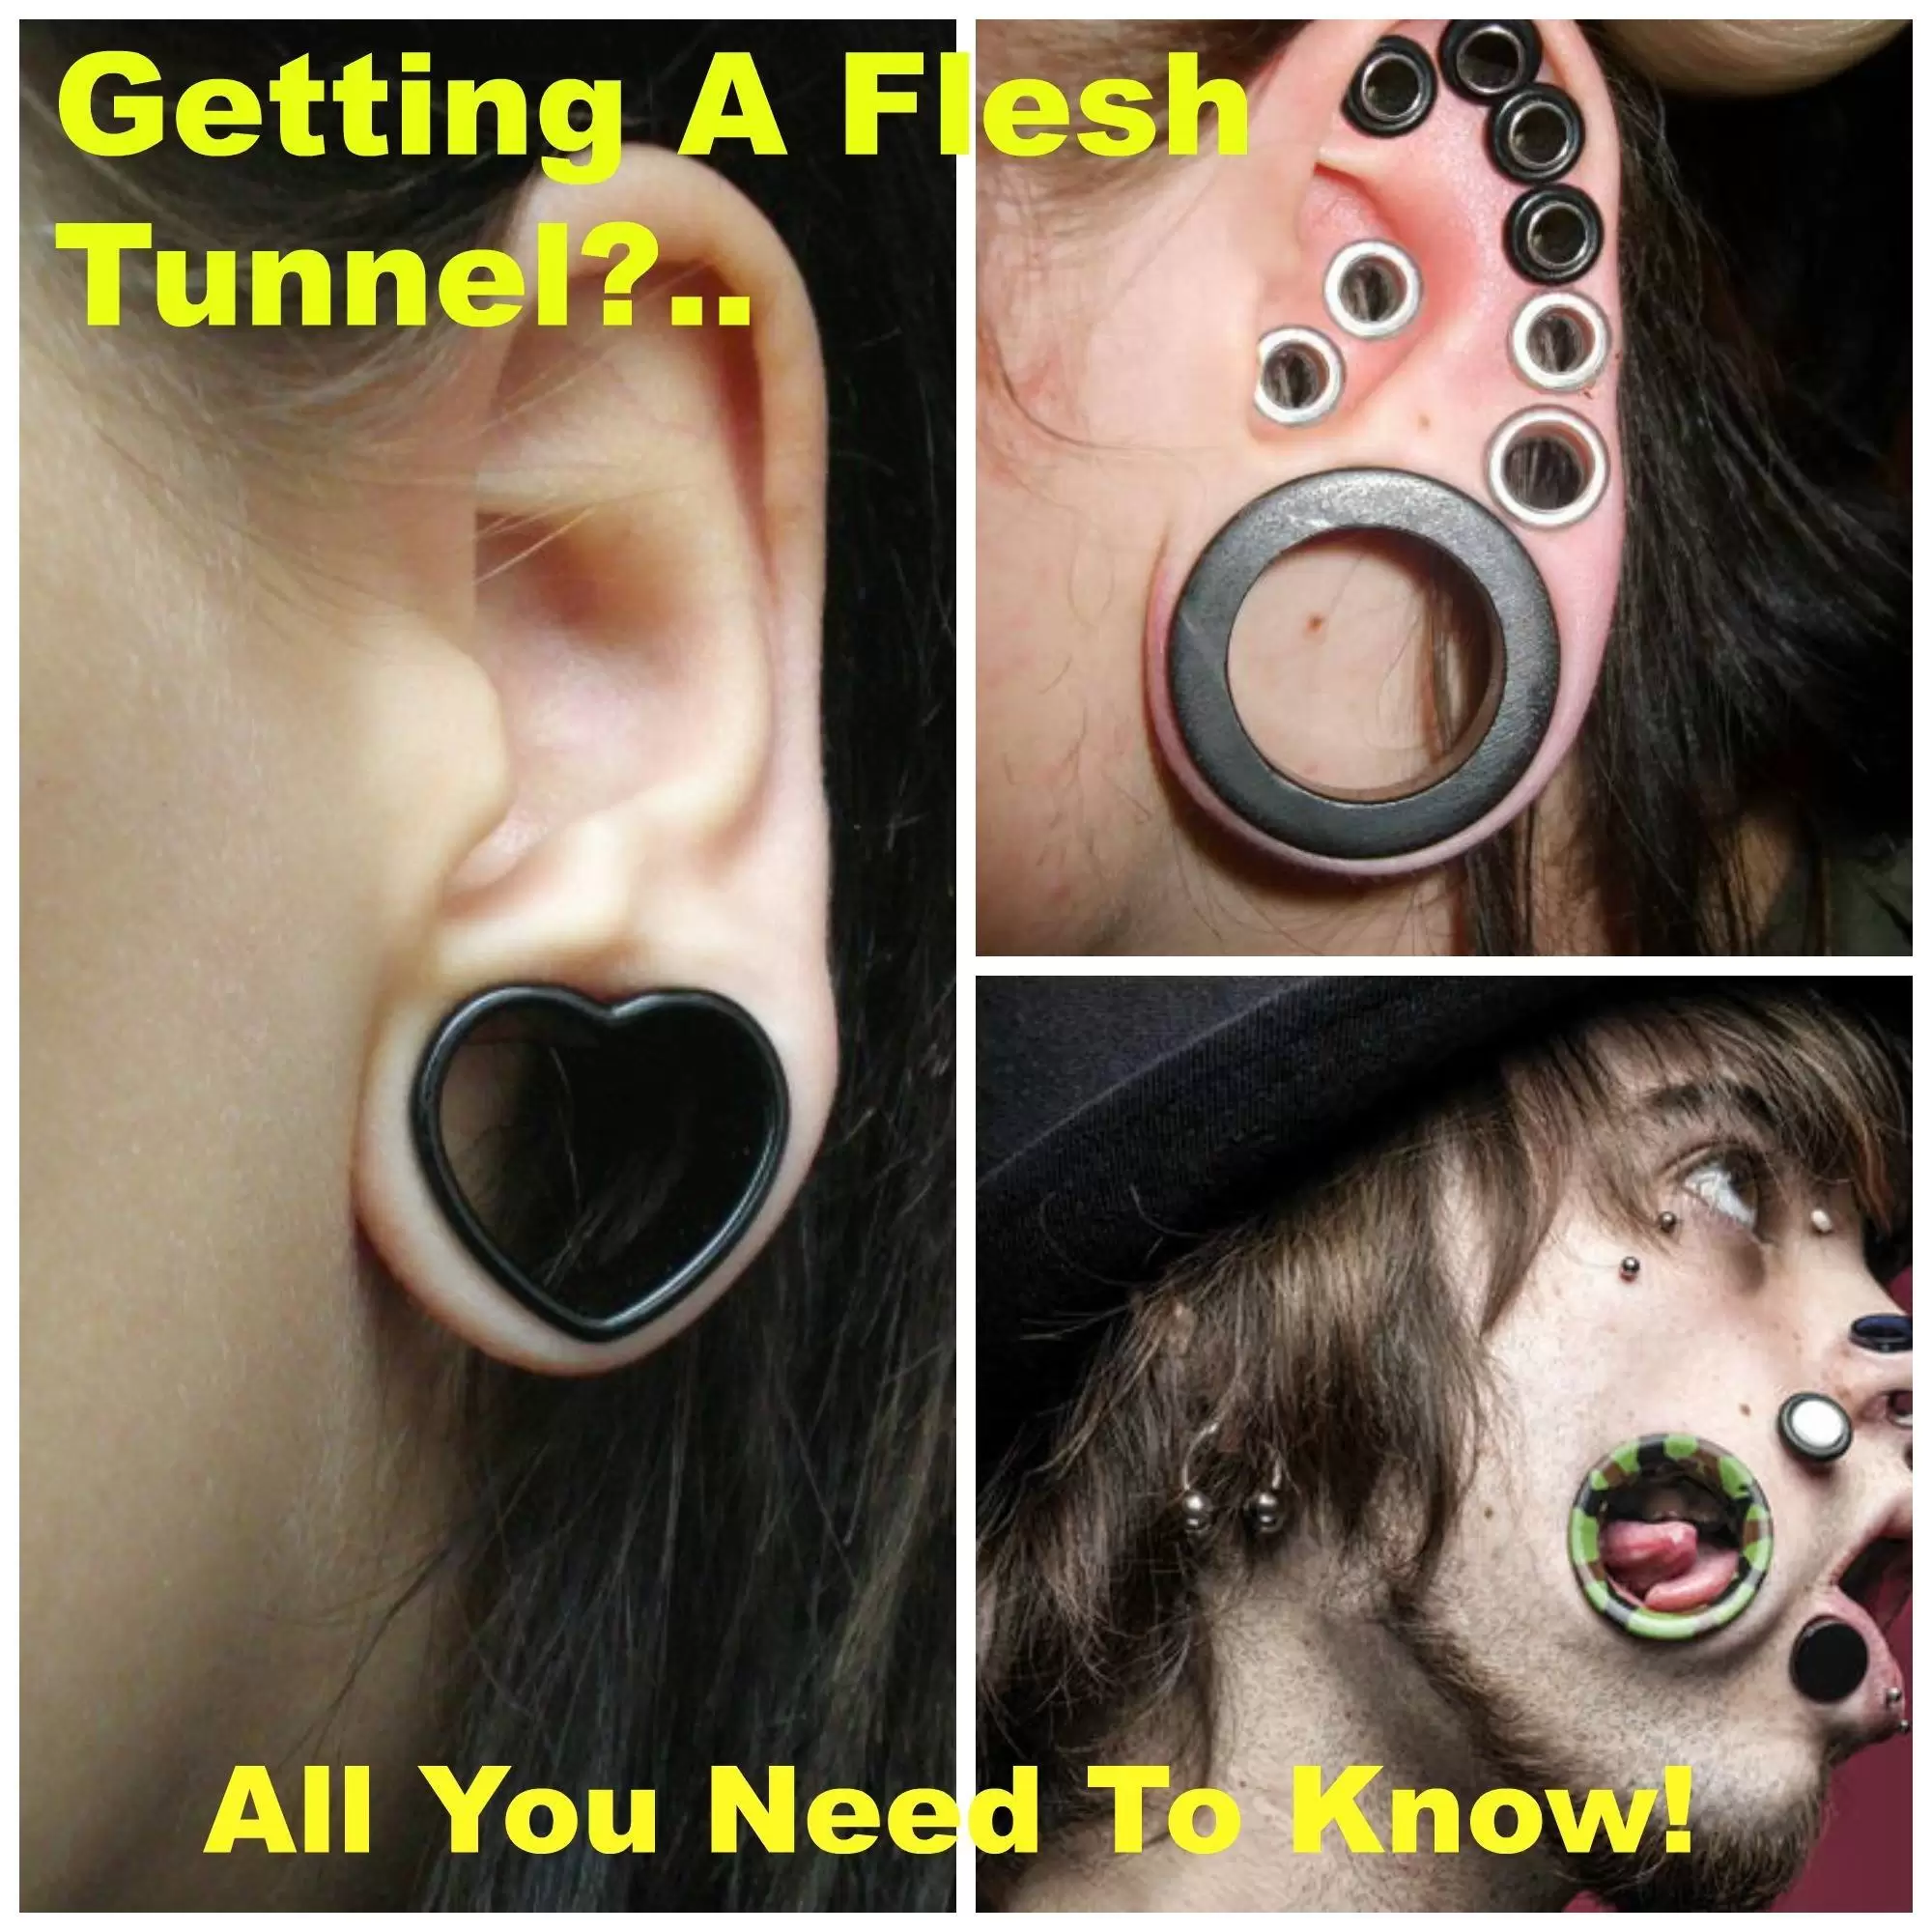
Getting A Flesh Tunnel – All You Need To Know
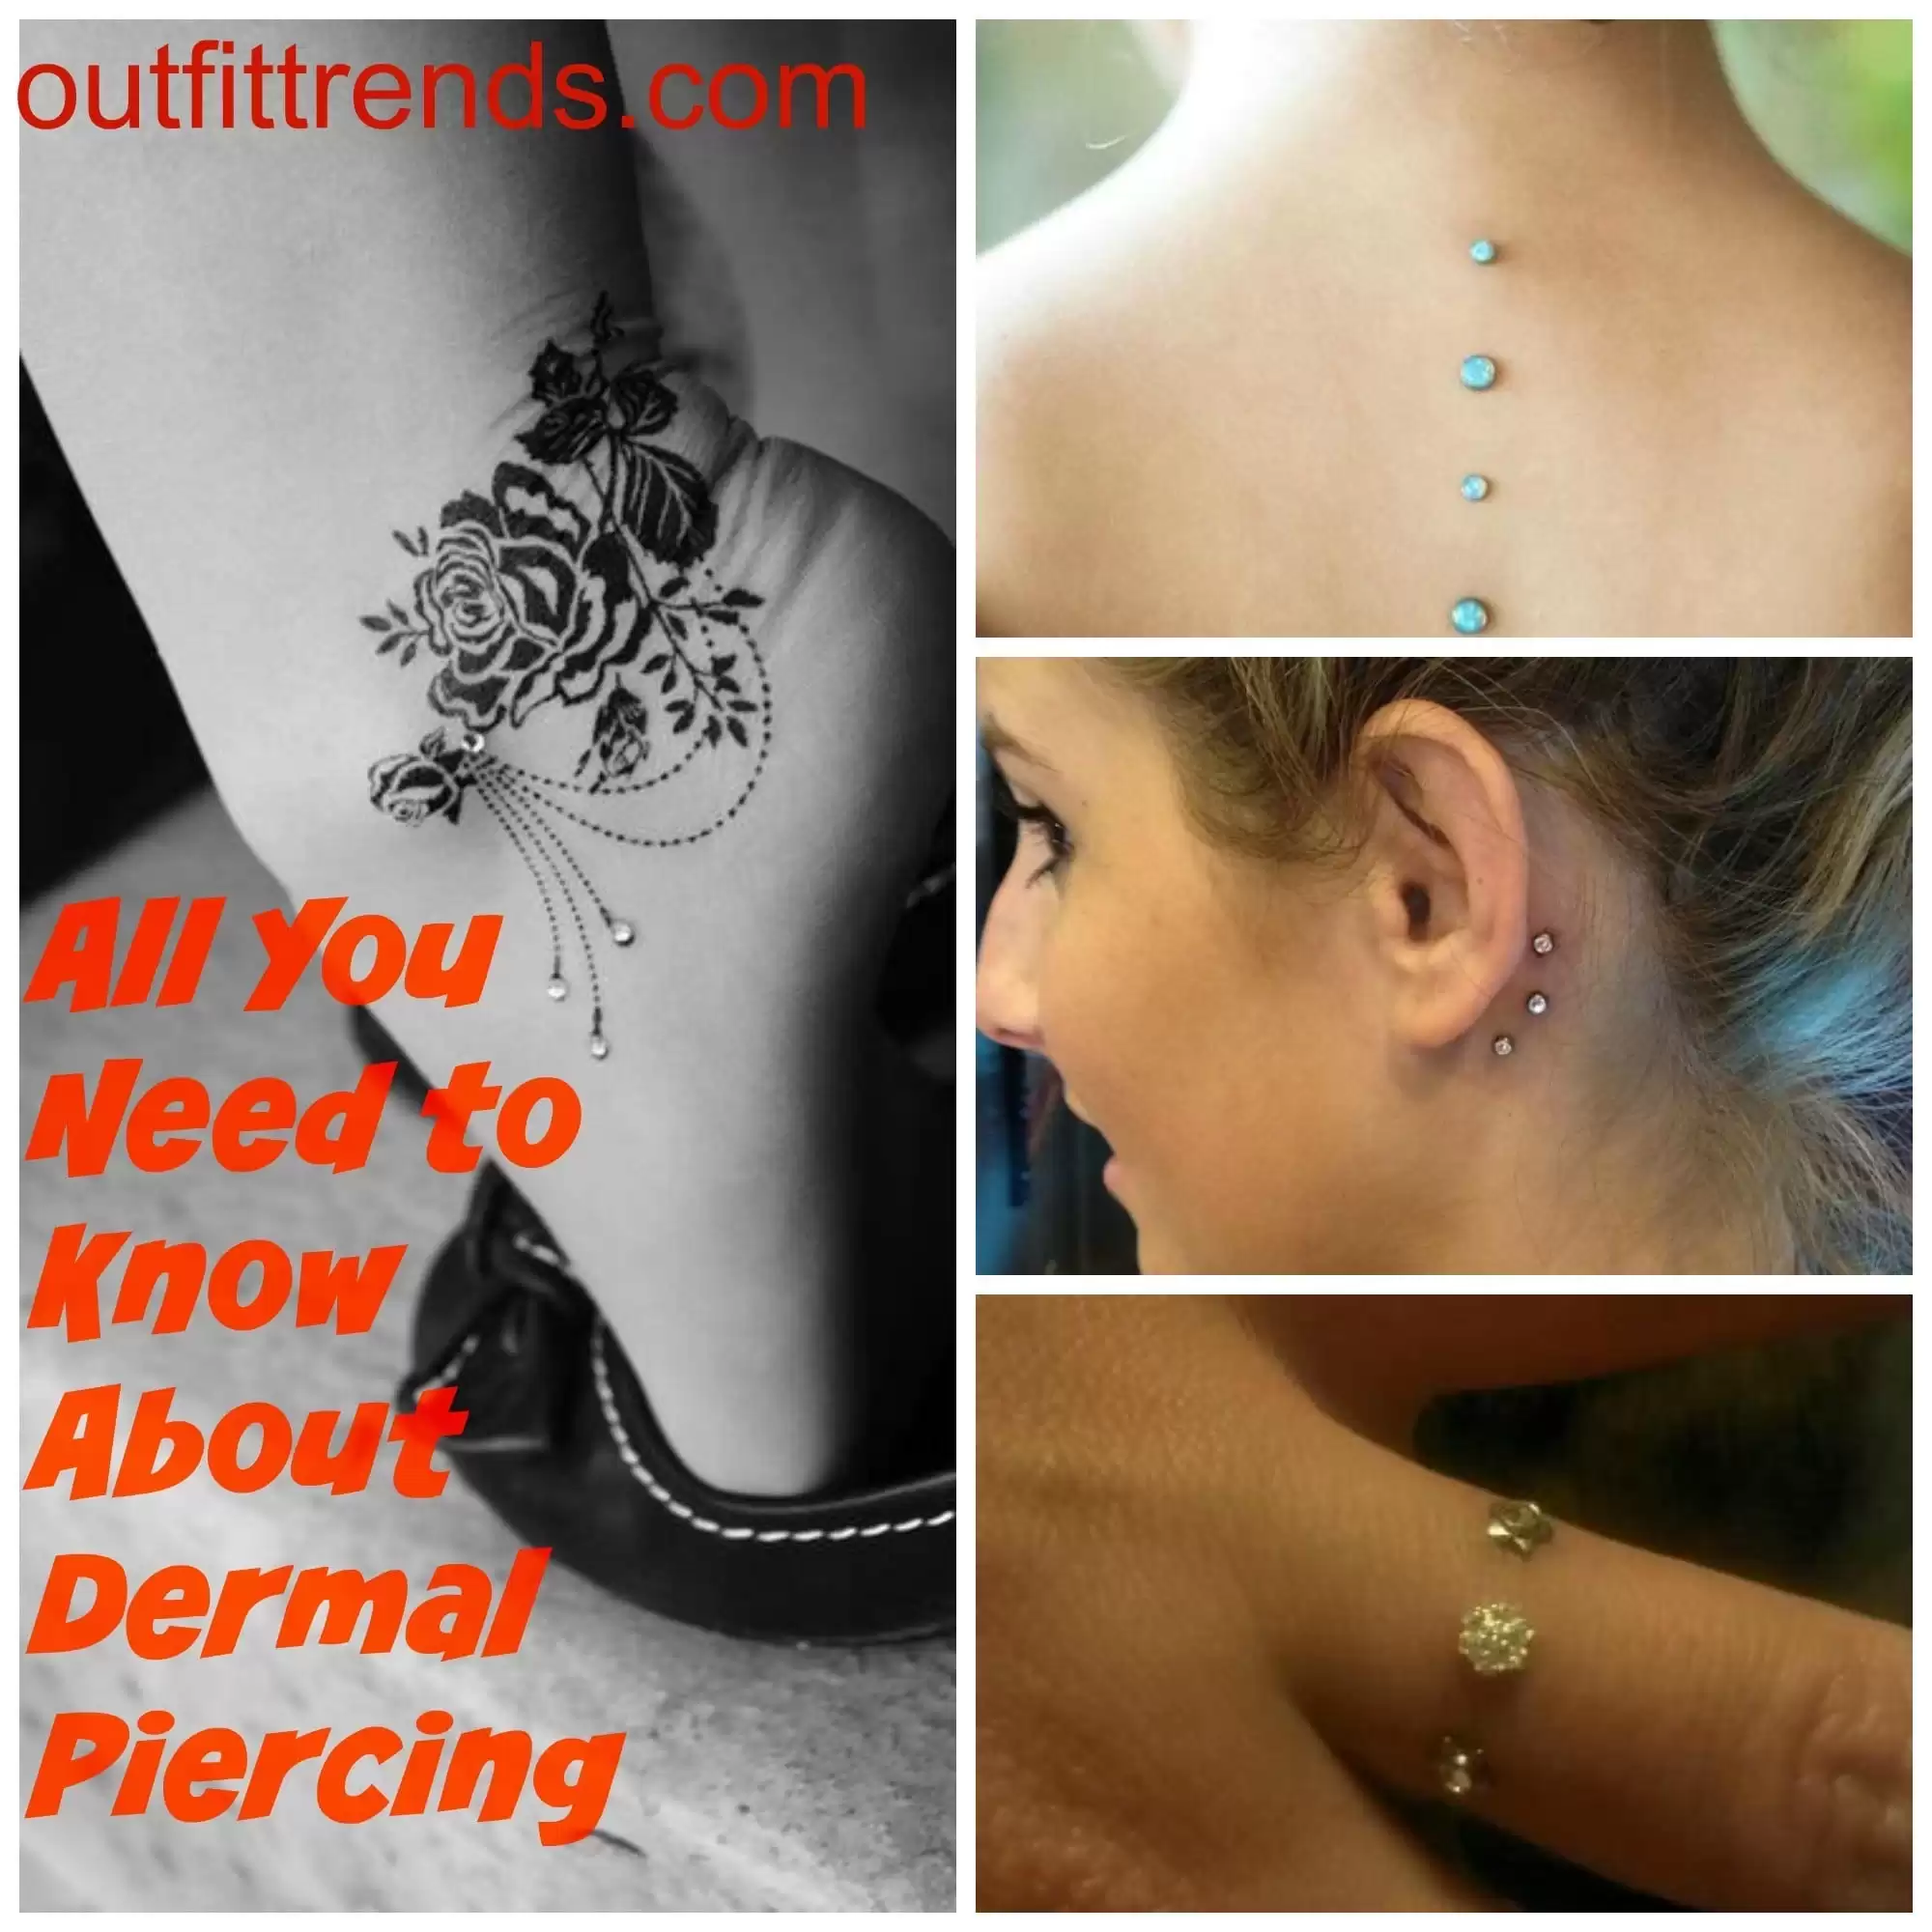
Getting A Dermal Piercing – What You Should Know

Swag Accessories – 5 Accessories You Need For A Swag Look

30 Most Creative and Unique Shoes In the World

25 Best Earrings to Wear With Long Hair
20 Most Beautiful Gajra Hairstyles For All Hair Lengths
Cartilage piercings can take 6-12 months to fully heal because cartilage has no direct blood supply, unlike the soft tissue of your earlobes which heals in just 6-8 weeks.
Styling Your Cartilage Piercings
Start with high-quality materials and you’ll avoid most common problems. I learned this lesson the expensive way after a cheap steel barbell caused irritation that lasted months. Titanium, surgical steel, or solid gold work best for initial piercings. The extra cost upfront saves you from complications, infections, and having to restart the healing process.
Plan your ear composition before you pierce rather than adding piercings randomly over time. I wish I’d done this — my left ear has four piercings that don’t quite balance visually because I added them impulsively. Sketch your ideal setup or use a piercing app to visualize how multiple piercings will look together. Consider how different jewelry styles will complement each other.
Choose jewelry that matches your lifestyle during the healing period. My industrial barbell caught on sweaters constantly for the first six months, and I had to completely change how I put on and took off tops. If you’re active or work with your hands frequently, opt for lower-profile studs over hoops or dangly pieces initially.
Consider your hair length and style when selecting piercing locations. Long hair can constantly irritate healing piercings, while very short styles might make certain placements more visible than you intended. I got my conch pierced right before cutting my hair short, and suddenly this relatively subtle piercing became a focal point of my entire look.
Build your collection gradually instead of getting multiple cartilage piercings in one session. Your body can only heal so much at once, and sleeping becomes nearly impossible when both ears are tender. I space my piercings at least six months apart now, which gives each one proper attention during the crucial healing period.
Invest in a good travel pillow with a hole in the center if you’re planning any cartilage piercings. This might sound dramatic, but side sleepers struggle significantly during healing. The donut-shaped pillows allow you to sleep on your preferred side without putting pressure directly on new piercings.
Dos & Don’ts
Pain Levels and Healing Timeline
Pain tolerance varies dramatically between individuals, but I can give you realistic expectations based on my experience and conversations with other piercing enthusiasts. Helix piercings hurt least — about a 3 out of 10 on my personal pain scale, with sharp initial pain that fades to a dull ache within hours. The healing process typically takes 6-9 months, though mine felt comfortable after about 4 months.
Conch and tragus piercings are significantly more painful because you’re piercing through thick, dense cartilage. I’d rate both around 6-7 out of 10, with the conch being slightly worse due to the amount of cartilage involved. The initial pain lasts longer too — expect throbbing for the first 24-48 hours. Healing takes 9-12 months minimum.
Industrial piercings are the most challenging both in terms of initial pain and healing complexity. The pain isn’t just doubled because you’re getting two piercings — it’s the connecting bar that makes everything more complicated. Every bump, snag, or wrong sleeping position affects both piercing sites. My industrial took 14 months to fully heal, and I experienced several setbacks when I wasn’t careful enough with aftercare.
The quality of pain matters as much as intensity. Cartilage piercings create a deep, pressure-like discomfort that’s different from the sharp, brief pain of earlobe piercings. Plan for several days of tenderness and avoid making important social or work commitments immediately after getting pierced.
Choosing the Right Jewelry
Material matters more for cartilage than any other type of piercing because the healing period is so extended. Titanium is my top recommendation — it’s lightweight, biocompatible, and doesn’t contain the nickel that causes reactions in many people. Surgical steel works too, but it’s heavier and can contain trace amounts of nickel.
Solid gold is excellent but make sure it’s 14k or higher. Lower karat gold contains too many alloy metals that can irritate healing piercings. I have several gold pieces that I love, but I always start healing with titanium and switch to gold later. Yellow, white, and rose gold all work equally well from a healing perspective.
Size and style affect healing significantly. Start with slightly longer barbells or posts to accommodate swelling during the first few months. Hoops look beautiful but move more than studs, which can irritate healing tissue. I learned this when I insisted on starting my helix with a hoop — it took months longer to heal than my stud piercings.
Avoid costume jewelry entirely until piercings are completely healed. Those cute $5 earrings from fast fashion stores often contain metals that will cause reactions, infections, or permanent discoloration around piercing sites. I made this mistake early on and ended up with a persistent irritation that required removing the jewelry and essentially starting over.
Cartilage Piercing Styles That Actually Work
Delicate Helix Cluster
Two small crystal studs placed close together on the upper ear cartilage create subtle sparkle without overwhelming your face. This works because the stones catch light at different angles, adding dimension to your ear line. Perfect for anyone who wants to test cartilage piercings without committing to a bold statement piece.
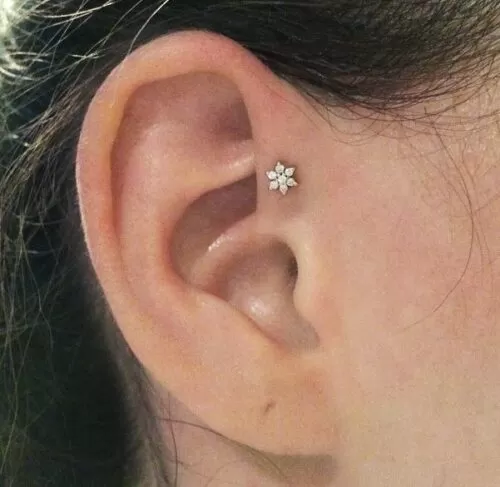
Minimalist Forward Helix
A single small flower stud positioned on the front curve of your ear adds interest without competing with earrings in your lobe. The forward placement means it’s visible from the front, making it more integrated with your overall look than traditional helix piercings. This suits people who wear their hair up frequently since it’s always on display.
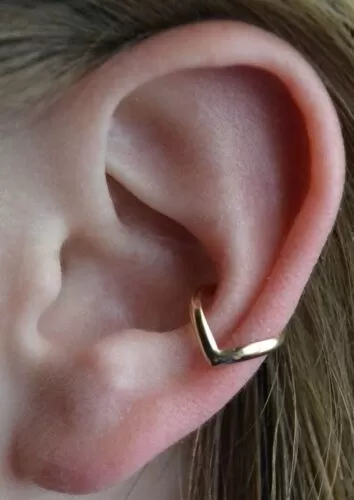
Sleek Ear Cuff Style
A smooth gold curved barbell that follows the natural line of your ear creates a modern, architectural look. The clean lines make it feel more like jewelry than a piercing, so it works with professional settings. This suits anyone who prefers geometric shapes over decorative elements.
Mixed Metal Ear Story
Combining gold and silver pieces across multiple piercings creates visual interest through contrast rather than matching everything perfectly. The pearl and small studs balance the bold ear cuff, preventing any single piece from looking too heavy. This approach works for people who like to layer different jewelry metals throughout their outfits.
Quick tip
Choose clicker-style jewelry over traditional rings for easier daily maintenance.

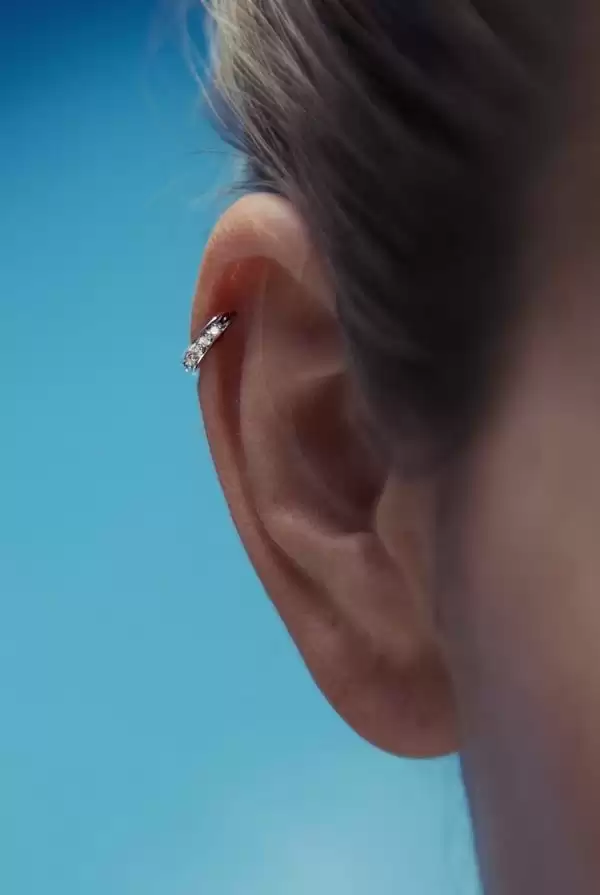
Simple Helix Statement
A single curved barbell with a crystal accent provides just enough detail to catch attention without looking cluttered. The gold tone warms up your ear line and complements both blonde and brunette hair colors naturally. This suits anyone who wants one standout cartilage piece rather than multiple smaller ones.
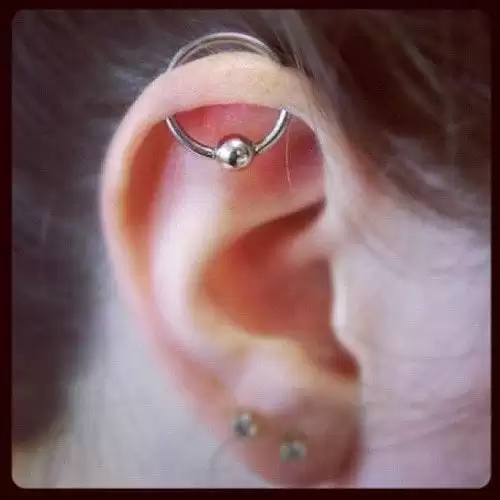
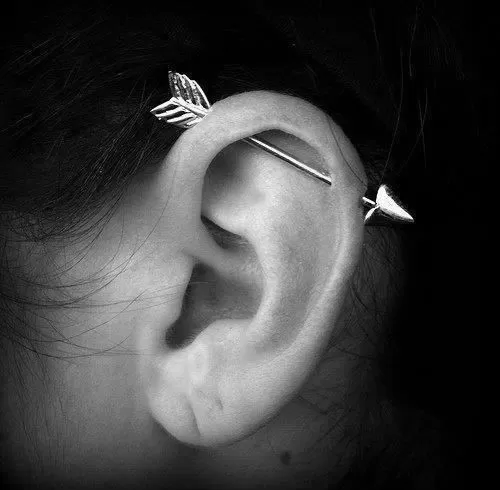
Industrial Bar with Ball Accent
The straight barbell connecting two points across your upper ear creates a bold horizontal line that balances round face shapes. The central ball adds weight to the design, making it feel intentional rather than clinical. This works for people who want their piercing to be a focal point rather than subtle accent.
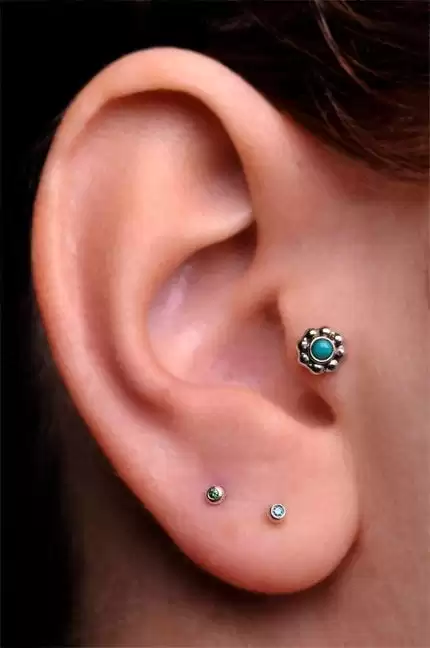
Tragus Flower Detail
A decorative stud in the small cartilage near your ear opening adds color and pattern close to your face. The turquoise center creates a pop that works especially well with warm skin tones and brown eyes. This placement suits people who want their piercing visible in profile photos without affecting how earrings sit.
Quick tip
Start with one statement piece per ear rather than multiple small studs.
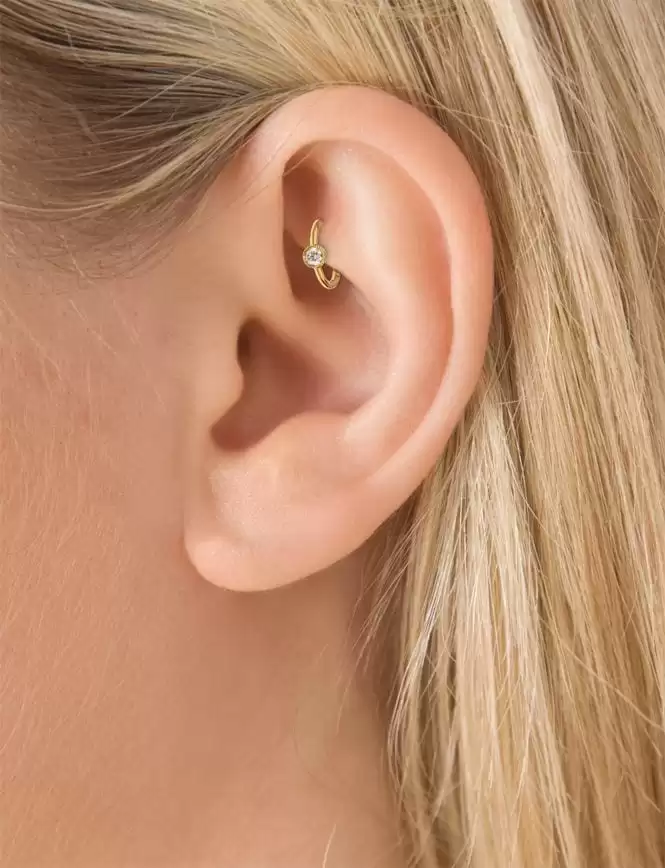
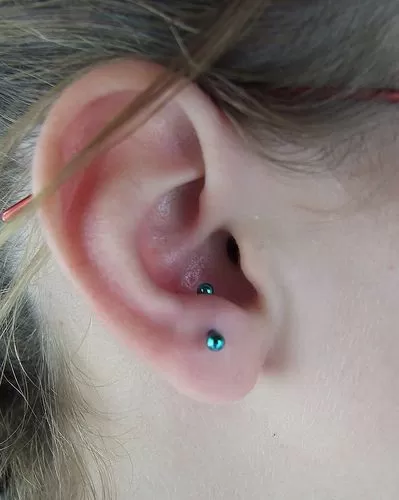
Double Conch Placement
Two small matching studs in the inner cartilage bowl create symmetry and depth without overwhelming your ear’s natural shape. The dark metal tones work with all hair colors and won’t clash with silver or black clothing. This suits people who like coordinated looks and want piercings that feel balanced rather than random.
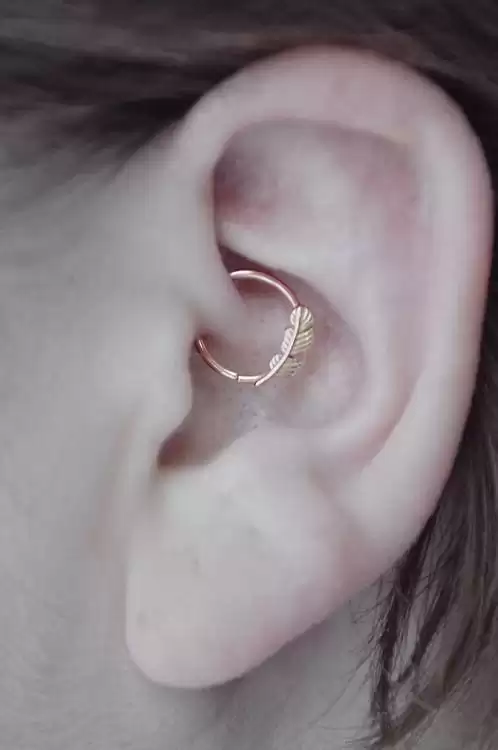
Feather Daith Accent
A curved barbell with feather detail in the innermost ear fold adds movement and texture to an often-overlooked area. The rose gold tone is universally flattering and creates warmth near your face. This works for people who want a unique piercing placement that feels artistic rather than mainstream.
Multiple Industrial Design
Combining different barbell styles across your upper ear creates an edgy, layered look that photographs beautifully. The butterfly detail softens what could otherwise feel too harsh or masculine. This suits people who want their ear piercings to function as wearable art rather than simple jewelry.
Quick tip
Match metal tones across all facial piercings for cohesive styling.
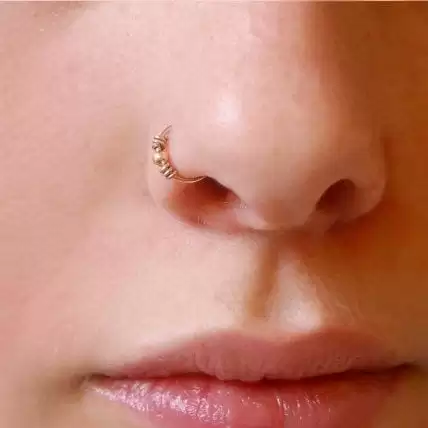
Simple Hoop Septum Ring
A delicate gold hoop in the septum creates an understated edgy look that works with any face shape. The thin gauge keeps it refined while still making a statement, and the warm gold tone complements most skin tones better than silver. This is perfect if you want to try facial piercings without committing to something too bold.
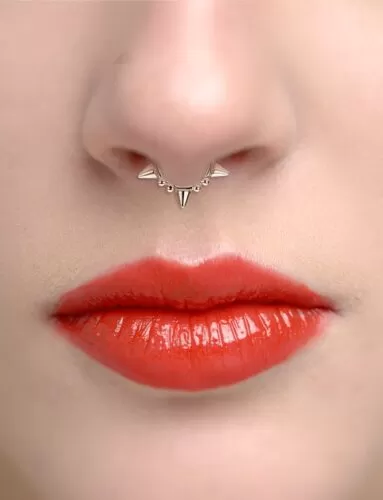
Spiked Septum Clicker
The geometric spikes on this septum piece add serious attitude while the clicker mechanism makes it practical for daily wear. The symmetrical design draws attention to the center of the face and works especially well on people with fuller lips like this. It’s statement jewelry that doesn’t require any other facial piercings to look intentional.
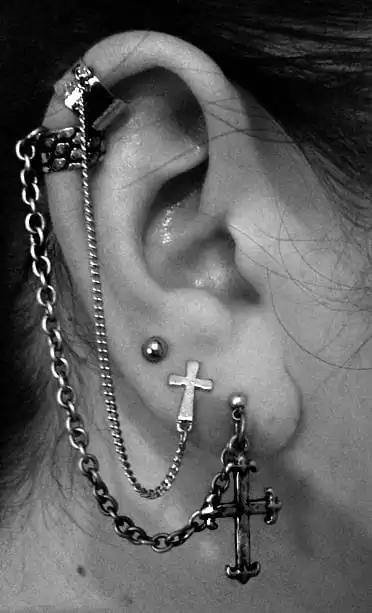
Multi-Chain Ear Setup
Connecting different ear piercings with chains creates one cohesive look instead of random scattered jewelry. The mix of cross pendants and plain studs gives this arrangement religious symbolism while the chains add movement and visual weight. This works best when you have at least three piercings to work with and aren’t afraid of daily maintenance.
Quick tip
Consider chain connections between piercings to create intentional arrangements.
Key takeaways
- Start with thinner gauge jewelry for your first cartilage piercing — it heals faster and looks less intimidating
- Choose gold over silver for facial piercings as it complements most skin tones better
- Connect multiple piercings with chains or matching sets to create intentional styling instead of random placement
- Consider your face shape and features — septum piercings work especially well with fuller lips
- Invest in quality clicker mechanisms for daily-wear pieces as they’re easier to clean and less likely to fall out
- Plan your piercing placement to allow for future connections and styling options rather than getting them randomly
Tragus Piercing Guide – Everything You need to Know
Surface Piercings – Everything You need to Know About It
Getting A Flesh Tunnel – All You Need To Know
Getting A Dermal Piercing – What You Should Know
Swag Accessories – 5 Accessories You Need For A Swag Look
30 Most Creative and Unique Shoes In the World
25 Best Earrings to Wear With Long Hair
20 Most Beautiful Gajra Hairstyles For All Hair Lengths


