Metallic Nail Art Tutorial – Creating a show-stopping metallic nail look can be tricky, however, you can easily create the perfect look just by following this tutorial. The metallic nail trend has gained immense popularity in recent times, especially among young girls. These nails are perfectly suited for night functions where it gives a shiny and glowing look. We saw on different forums that a lot of girls are confused about this new trend, asking how to easily make metallic nails and how metallic nails can be done at home. Well, here we bring the simple and easy tutorial to make metallic nails yourself. Just follow this step-by-step tutorial and you can make it easier.
How To DIY Metallic Nails?
There are so many funky nail art designs to choose from, you can make any metallic color nails you want. For a foil metallic look, all you need is a foil of any color, foil glue, top & base coat nail polish, and a q-tip to clean any mistakes that you might make. There are other options that you can opt for including shimmery metallic nail polish, Sephora magnetic nail polish, OPI chrome nail polish, etc. Silver metallic nails have been the hottest trend because of their natural color shine. New metallic nail trends include purple nails, and golden and green metallic nails. This tutorial will teach you how to apply metallic foil to get the perfect metallic nails.

Tips For Perfect Nail Art
Before you start with this super fun DIY, you must remember that you might not achieve perfection in the very first attempt, like any other form of art, this too needs some time and work to reach a certain level of perfection. However, this tutorial will help you get there by taking you through each step with all the necessary details. Now, that we’re ready to dive into the tutorial, the first and foremost thing that we recommend is that you cut selected foils at once and have them ready for you, here are some other helpful tips and tricks for you to follow.
- Clean nails are essential – It is extremely important that you clean your nails before you start to do metallic nail art. This will ensure that metallic foils stick better to your nails and will last longer. You can clean the nail either by rubbing alcohol or even with a simple nail polish remover.
- Let the glue dry for 90-120 seconds before putting foil – It is very important that you let the glue dry before applying the metallic nail foil. This will help the metallic nail foil to adhere to the nail properly and will make the metallic nail art last a lot longer.
- Finish off with a top coat – You would want your nail art to last longer, for this, a topcoat is a must, other than making sure that your nail art lasts much longer, it will also give an even look.
- Go for matching base color – This makes a huge difference! this will help conceal the natural color of the nails and prevent it from peeking through the foil.
- Just one coat on top – That’s right, after you’ve applied the metallic foil and it is cured, add just one gel coat to seal everything in. Also, make sure that you coat all the edges of the foil.
- Tweezers to take the foil off – Using a pair of tweezers definitely helps in removing the foil in one go without a mess and in less time.
- Small brush to clean up the excess – Keeping a small brush while you do metallic nail art can become quite handy. You can easily clean up the edges after the foil has been cured making sure that the nails are ready for the final coat.
Step by Step DIY Metallic Nail Art Tutorial
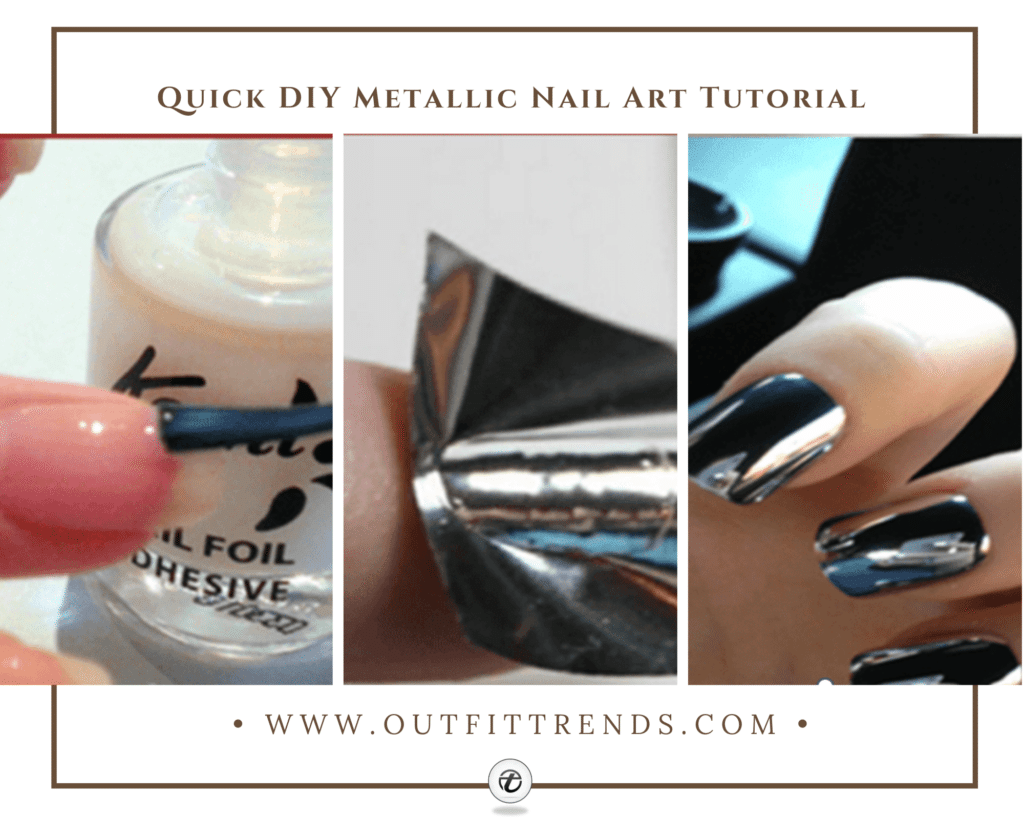
- Gather all the things you will need for the DIY, metallic foil with matching base nail paint, foil glue, gel top coat, Q-tip. Make sure you cut the foil as per your nail size beforehand.
- Start by applying a base coat (preferably matching with the foil but transparent-based nail polish will work as well). Wait for a minute for the base coat to dry. Apply the foil glue on the nails and let it cure for 30 seconds, if you apply the foil while the glue is still wet, it will slip and not stick properly giving a sloppy look.
- After the glue has cured, apply the metallic cut as per your nail size using a pair of tweezers and adjust it accordingly, make sure that the foil covers the edges of the nails too. Let the metallic foil cure for a minute to ensure that it is set and does not move.
- Now that the metallic foil has been applied, the next step is to apply a gel top coat, make sure to apply just one coat for a neat look. Finally, take a small brush and clean the sides. Voila! with just these steps, your DIY metallic nail art is ready for you to show off.

Now, you’re all set for the DIY metallic nail art. Do give it a try and you would be surprised with the results. This nail art will provide remarkable results in the comfort of your home. Do follow the tips to achieve the perfect metallic nail art look.
Frequently Asked Questions
Q: What are nail metallic foils made of?
Ans: These are basically thin laminated sheets, you can apply them on your natural nails or even on acrylic nails. Using these sheets, you can create manicures that will not go unnoticed. Also, the metallic nail foils come in different colors for you to choose from.
Q: Does metallic foil nail art last longer than regular nail art?
Ans: Definitely, if you follow the tips and make sure that the foil is cured properly before you seal it with the topcoat, it will last much longer. Also, using a matte base color helps to keep the foil on the nails for longer and also prevents the natural nail color from peeking through.
Q: How to take off metallic nail art?
Ans: To easily remove the metallic nail art, soak your nails in acetone and wait for a few seconds, grab some cotton and tear off a small piece, dip it in acetone and after this, wrap the nails with a foil wrap. You need to wait for 20-25 minutes and press and remove the foil.


